www.oniriibike.com
ONIRII M13-TI Titanium-Axle MTB Self-locking Pedal Injection-Molded Carbon SPD/SPD-SL for Mountain. Folding, Gravel Bike, BMX
ONIRII M13-TI Titanium-Axle MTB Self-locking Pedal Injection-Molded Carbon SPD/SPD-SL for Mountain. Folding, Gravel Bike, BMX
Couldn't load pickup availability
M13-TI Titanium-Axle MTB Clipless Pedals
Smooth, Sturdy, Durable
The all-new, upgraded ROLTA M13-TI clipless pedals replace the older MPD-01 model!
While retaining the advantages of universal compatibility across multiple bike models and compatibility with two cleat sizes.
These pedals feature significantly reduced weight and upgraded axle and bearing structures.
This results in a comprehensive evolution in pedaling stiffness and smoothness, balancing off-road durability with pedaling efficiency.


Major Weight Reduction: 76g Lighter
The previous MPD-01 model weighed 345g per pair, while the new M13-TI weighs just 269g per pair.
With the switch to an injection-molded carbon fiber body and titanium alloy axles, the bike’s unsprung mass has been significantly reduced, making acceleration and climbing feel lighter and more responsive, and reducing leg fatigue during long-distance rides.

Titanium Axle, Significantly Reduced Weight
Ball Bearing + DU Combination, Maximum Smoothness and Durability
Upgraded titanium alloy axle: Compared to the standard bearing structure of the previous model, it offers smoother rotation, better pedaling stiffness, and no play when applying force;
The high-strength bearing structure resists mud and sand and withstands impacts, ensuring stable and long-lasting rotation even in complex off-road environments.

M13-TI New Version Pedal
Internal Assembly Sequence Guide
①. Titanium alloy axle
Note: The titanium alloy axle must be coated with an anti-seizing compound.
②. Dust- and water-resistant rubber O-ring
③. Self-lubricating DU bearing
④. Spacer
⑤. Anti-slip lock nut
⑥. Ball bearing
⑦. CNC side cover

MPD-01 Older Version Pedal
internal components
① Aluminum alloy housing
② Bushings
③ Chromium-molybdenum steel axle

Larger pedal contact area for more stable engagement
The optimized pedal design increases the contact area, ensuring a more secure engagement between the cleats and pedals. The self-locking mechanism features built-in anti-slip properties, allowing for smooth engagement and crisp release, maximizing riding safety.

Correct Your Riding Posture and Improve Pedaling Efficiency
The self-locking cleat design effectively corrects improper riding posture, allowing for a more complete application of force and reducing energy loss; the cleats are easy to install, making them accessible to riders of all skill levels.

Compatible with Two cleat Types
Universal Fit for Multiple Bikes, Versatile Applications
Compatible with both SPD and SPD-SL cleat specifications, the M13-TI can be installed on mountain bikes, road bikes, folding bikes, and BMX bikes, making it suitable for use across multiple bikes. Whether for daily training or long-distance rides, the M13-TI delivers consistent performance.
(Anti-Seize Washers
Quick Tip:
When installing titanium alloy pedals, be sure to use the included anti-seize washers to prevent the pedals from seizing onto the crankset. This is more effective than any lubricant and also makes future disassembly easier.)

Left/Right Distinction, Easy Installation
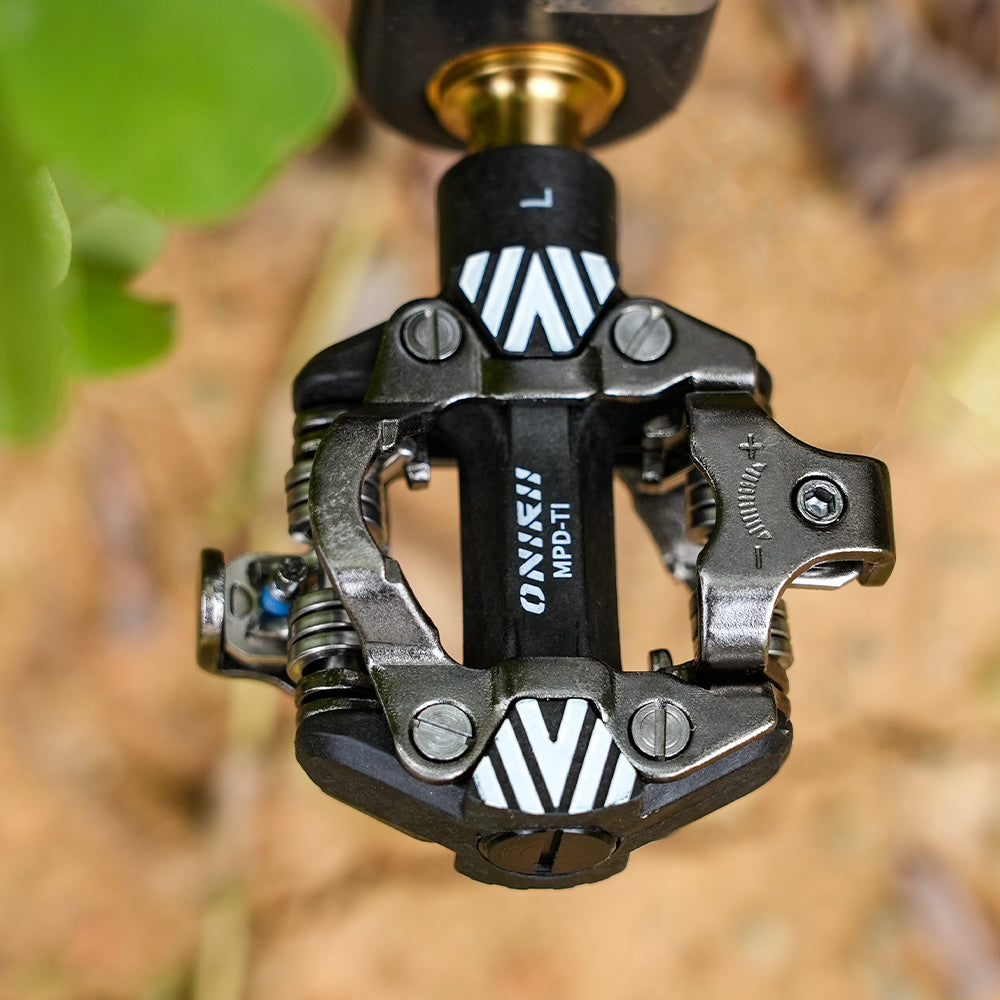
Marked with L (Left) / R (Right) indicators
The left and right foot straps feature L/R markings, making tension adjustment simple and installation quick; the upgraded design combines performance with style.

Actual Photos

Pre-Purchase Information:
1. Pedals must be installed with the correct left and right orientation; otherwise, the crank threads may be damaged. The left pedal is marked “L,” and the right pedal is marked “R.”
2. For both pedals, turning them forward tightens them, and turning them backward loosens them. Ensure they are securely tightened during initial installation to prevent them from coming loose.
3. Pedals are covered by a one-year warranty from the date of purchase; bearings are not covered by the warranty.
Usage Tips:
1. After receiving the pedals, manually rotate them a few times before installation and adjustment. Before using these pedals, please fully understand the mechanism for engaging and disengaging the pedals and cleats.
2. You must use the dedicated cleats and secure them to your cycling shoes with the cleat screws.
3. Adjust the spring tension on both pedals to the optimal level; otherwise, it may be difficult for the rider to clip into or unclip from the pedals.
4. Before using these pedals, hold the brakes firmly, keep one foot on the ground, and practice clipping in and unclipping with each foot repeatedly until you are proficient.
5. Practice riding on flat ground until you can skillfully clip the cleats into and out of the pedals.
6. In the following situations (when riding very slowly, about to stop, turning around, approaching an intersection, going uphill, on a curve with poor visibility, or in areas where unexpected situations may arise at any time), please unclip your cleats from the pedals in advance so that both feet can touch the ground at any time.
7. To maintain optimal clip-in and clip-out performance, promptly remove dirt and debris from the pedals and cleats.
8. Check the cleats for wear regularly. If they are severely worn, replace them promptly. After installing new cleats, readjust the spring tension to the optimal level.
Please be sure to read the above precautions carefully and follow them. Failure to follow these precautions may result in the cycling shoes failing to release from the cleats or accidentally coming loose, which could cause a fall and lead to an accident.